Project case study
Pine Floorboards Restored and Stained Walnut in South Shields
A real wood floor restoration case study showing how original pine floorboards in South Shields were sanded and stained walnut to transform the room.

A real wood floor restoration case study showing how original pine floorboards in South Shields were sanded and stained walnut to transform the room.
The homeowners wanted to modernise the appearance of their original pine floorboards while still keeping the character of the timber.
The existing floor looked tired and dated, and the lighter pine colour no longer suited the overall style of the room. Rather than replacing the floor altogether, they chose professional sanding and staining as a way to completely refresh the space.
That decision often makes a lot of sense with original floorboards. If the timber is still sound, restoration can change the look of the room dramatically without losing the existing floor underneath.
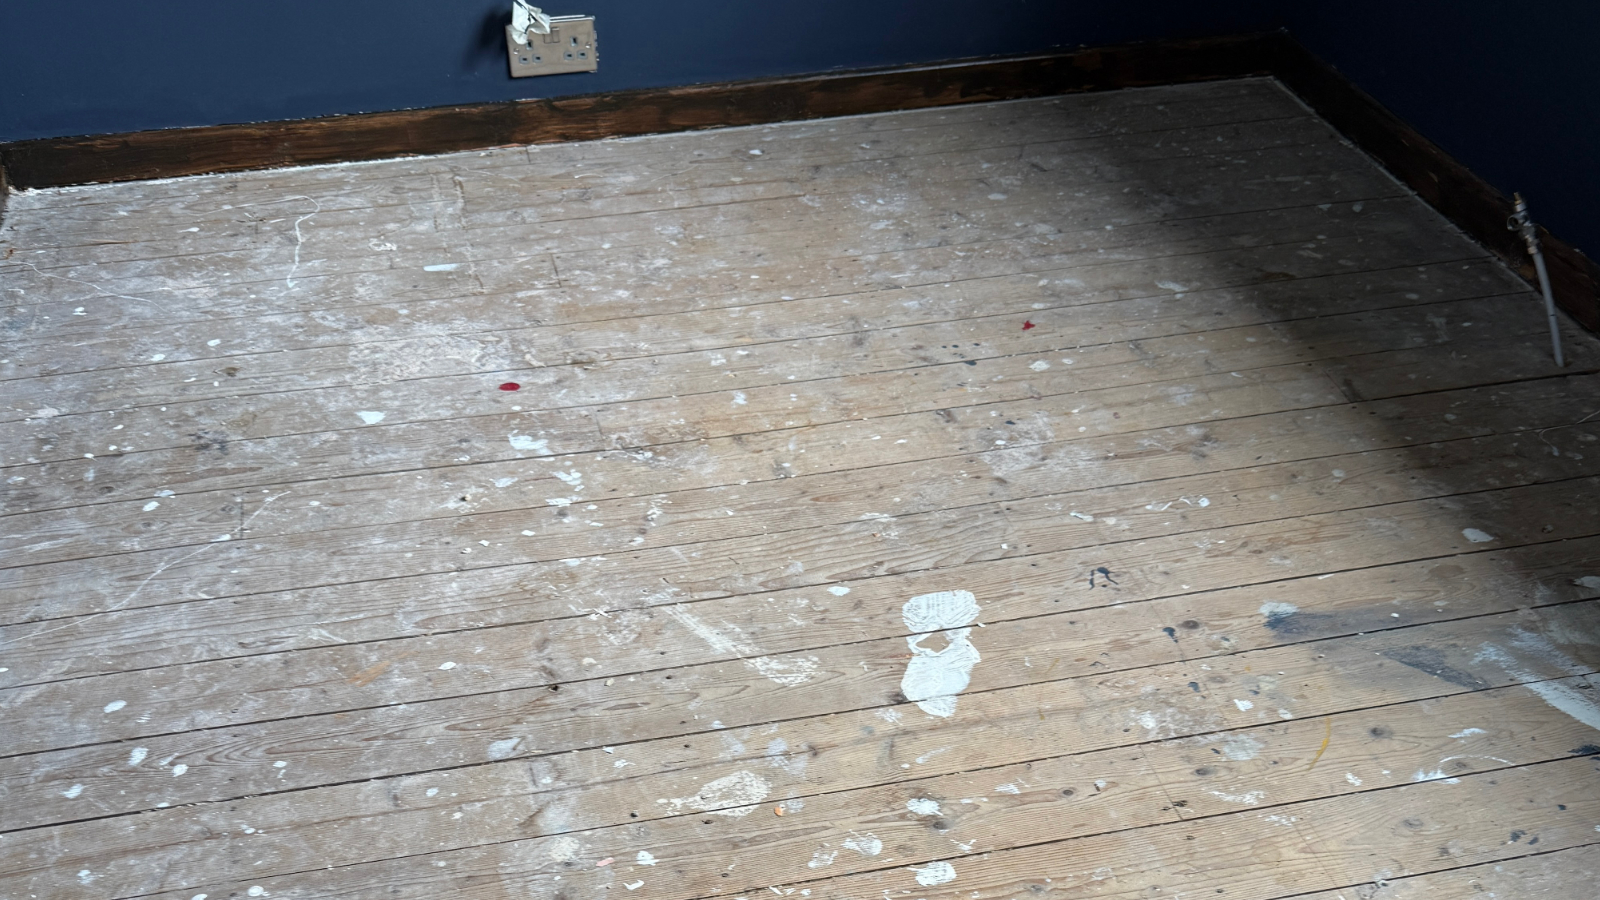
These were original pine floorboards in a residential property in South Shields, Tyne & Wear.
At the start, the floor showed:
Despite that, the boards remained structurally sound and were very good candidates for restoration.
That is the key point with many older timber floors. They may look tired on the surface, but the boards themselves often still have plenty of life left in them. Where the timber is stable, sanding and refinishing can be a far more sensible route than replacement.
If you are weighing up that decision yourself, our guide on whether to sand or replace a wooden floor is a useful place to start.
Before the sanding process began, the floor was inspected to check the overall condition of the boards and identify whether any repairs were needed before restoration.
This stage helps make sure the floor is properly prepared for the work ahead. It also allows realistic expectations to be set before anything starts, especially where there are visible marks, colour differences or old surface contamination.
In this case, the boards were suitable for sanding and staining, which meant the room could be transformed without the disruption of a full floor replacement.
The first main stage of restoration was sanding back the original pine floorboards to remove the worn finish, surface wear and any contaminants sitting in the top layer of the timber.
Modern sanding equipment captures the vast majority of dust created during the process, which makes floor restoration much more manageable than many people expect. It is not the same as older-style sanding where dust spread freely around the house.
As the floor was sanded back, the timber became cleaner and more even, giving a much better base for the colour change the homeowners had in mind.
If disruption is one of the reasons you hesitate over floor sanding, our article on how much floor sanding disrupts a home explains that side of the process in more practical terms.
Once the heavier sanding work had been completed, the floor was prepared more carefully for staining.
This stage matters because stain will only look right if the timber surface is even and properly prepared first. Any inconsistency in the sanding can show through more clearly once colour is applied, so taking the time to prepare the boards well is one of the most important parts of the process.
On pine in particular, preparation plays a big role in how cleanly and evenly the final colour develops.
With the boards prepared, a walnut-coloured stain was applied to deepen the overall tone of the floor.
This was one of the biggest changes in the whole project.
Staining allows homeowners to dramatically alter the appearance of pine floorboards without replacing them. Instead of staying with the original lighter pine tone, the floor can be shifted towards something richer, darker and more in line with the style of the room.
In this case, the walnut shade gave the floor a more contemporary appearance while still allowing the grain and natural character of the timber to remain visible.
That balance is often what homeowners are looking for: a new visual feel without losing the fact that it is still a real timber floor.
Once the stain had been applied and the colour was where it needed to be, a durable protective finish suitable for everyday residential use was added.
Finish choice was discussed with the homeowners in advance based on the kind of appearance they wanted and the level of maintenance that would make sense for them going forward.
That matters because the finish affects both:
If you are comparing that side of the process yourself, our guides on the best finish for a wooden floor and the wider wood floor finish guide explain the options in more detail.
The finished result brought a dramatic visual transformation to the room.
The restored floor had:
The darker walnut tone changed the feel of the room completely. Instead of looking pale, worn and dated, the floor now felt more deliberate, more refined and much better suited to the homeowners’ style preferences.
That does not mean the floor looked artificial or disconnected from the property. The original timber character still came through clearly, but in a way that felt more aligned with how the room was meant to look.
Staining is often one of the most appealing ways to update original pine floors.
Changing the colour of the boards can alter the whole feel of a room far more than many people expect.
Some homeowners like the character of pine, but not always the lighter or more orange tone that older boards can take on over time. Staining offers a way to modernise that appearance without losing the floor itself.
For many households, keeping the original boards is part of the appeal. Restoration allows that character to stay in place while still improving the look significantly.
Replacing a floor usually means removing the original material, buying new flooring and taking on the wider disruption that comes with installation. Staining and refinishing are often a much more attractive alternative where the boards are still sound.
That is why many people explore restoration first. It allows the look of the floor to change dramatically without the cost and upheaval of starting again from scratch.
One of the biggest visual changes in this project was the move from lighter pine to a much richer walnut tone.
Before restoration, the floor looked worn, uneven and no longer really suited the room. After sanding, staining and finishing, the boards looked warmer, darker and much more in keeping with the homeowners’ preferred style.
This project can also be viewed on our Before & After page alongside other real wood floor restorations.
Before restoration: the original pine boards looked lighter, more dated and marked by years of everyday use.

After restoration: the walnut stain gave the floor a richer, warmer and more contemporary appearance while still showing the timber grain.
The homeowners achieved the darker, more contemporary appearance they wanted while retaining their original timber floor.
That is often the real value of restoration and staining. Instead of replacing the floor to change the look of the room, it is possible to work with the timber that is already there and transform it in a much more practical way.
If you want to explore the wider advice section as well, our wood floor restoration guides bring together practical information on sanding, finishes and restoration choices.
Before assuming replacement is the only route, it is often worth exploring what professional restoration and staining can achieve first.
Our wood floor restoration service page explains how we assess original timber floors, discuss finish options and help homeowners decide whether restoration is the most sensible next step.
Send us a few photos or tell us what you are dealing with. We will explain whether cleaning, restoration or replacement is the most sensible next step.